※This is a setting manual page for MakeLeaps for Salesforce (ML4SF) .
0. Contents
![]() Setup
Setup
![]() Install MakeLeaps for Salesforce
Install MakeLeaps for Salesforce
![]() Salesforce Setting
Salesforce Setting
ー・Modify Connected Apps Authentication
ー・Edit Permissions
ー・Manage Assignments
ー・Modify Accounts
ー・Add MakeLeaps to your account pages.
ー・Add Sync with MakeLeaps button to accounts list page.
ー・Modify Contacts
ー・Add MakeLeaps to your contact pages
ー・Modify Opportunities
ー・Add MakeLeaps to your opportunity page.
![]() ML4SFを開始する
ML4SFを開始する
ー・Salesforce内でMakeLeapsと接続する
ー・MakeLeapsのアプリケーションを認証する
ー・「取引先」情報をMakeLeapsに同期する
![]() その他
その他
ー・[Group/Professional エディションの方] 権限セットを追加できない場合
ー・新しいユーザを追加する
ー・メールポイントを追加する
ML4SF (MakeLeaps for Salesforce ) Setting Manual
1. Setup
※This process is only required for the first time (Click here to add new user)
- Login to current Salesforce account
- Need Admin access (to install new app)
- Need Salesforce billing month
- Logout from current MakeLeaps account
(To use this feature, you will be required to create new MakeLeaps account. Please contact support@makeleaps.com for issues concerning transfer of data and mail points)
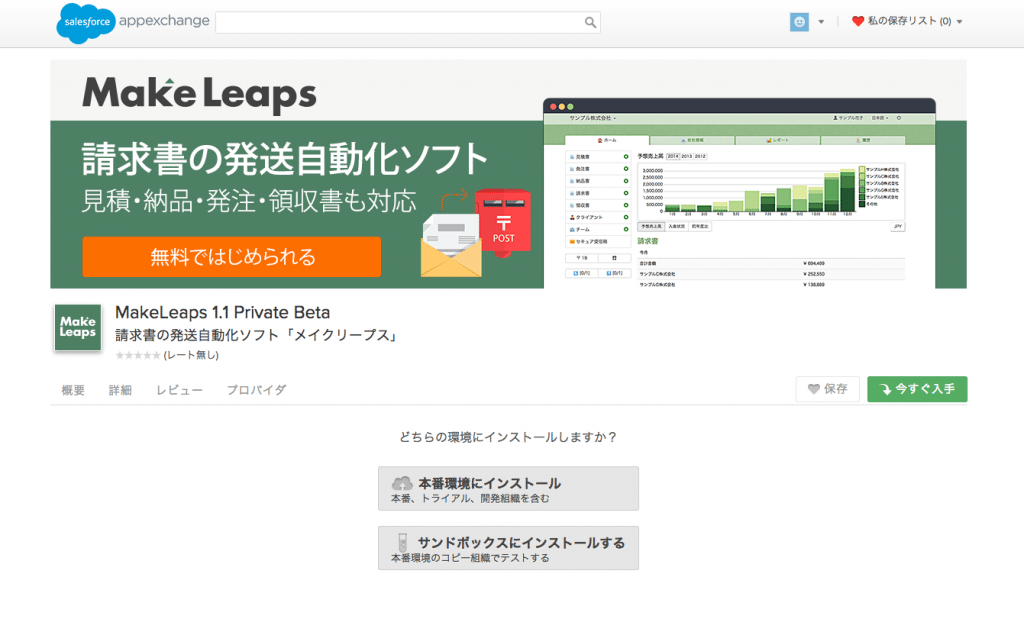
2. Install “MakeLeaps for Salesforce”
- Download MakeLeaps from our AppExchange listing.
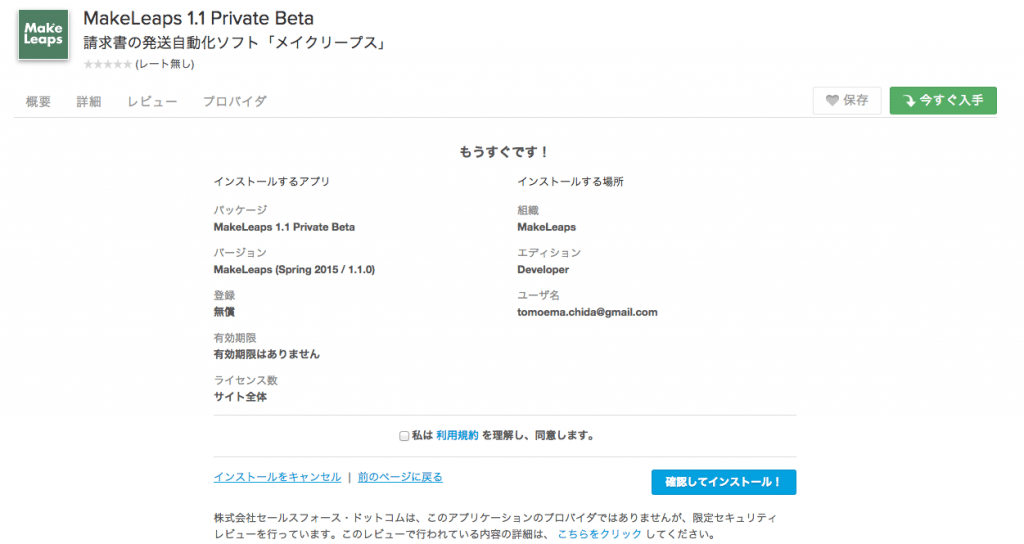
- The Package Installation Details page displays all package components. Click Continue.
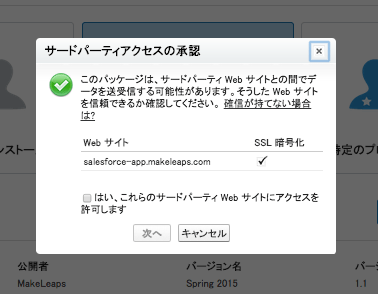
- Click Yes, grant access to these third-party web sites box and click continue.
- Click Next to approve all permissions on the first step of the Package Installer.
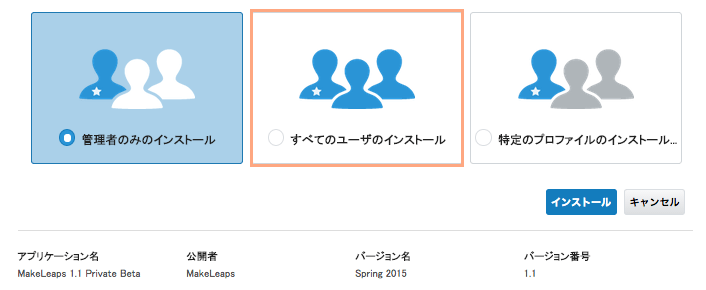
- On the second step, choose Grant access to all users and click Next.

- On the third step, click Install.

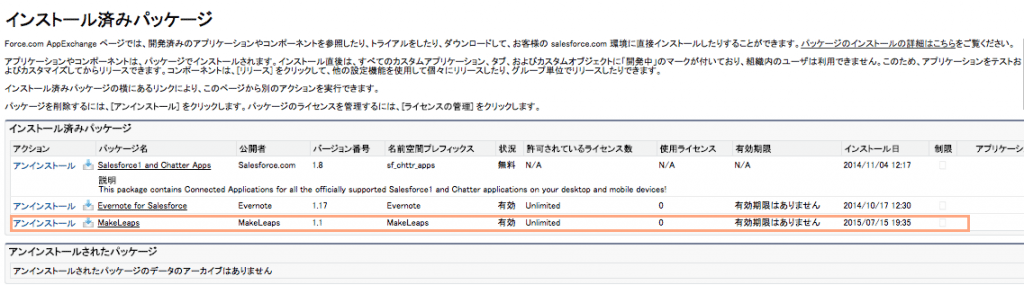
- Confirm that “MakeLeaps” show up in the Installed Package (インストール済みパッケージ) list
3. Salesforce Setting
Modify Connected Apps Authentication
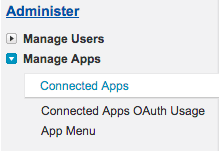
From Setup, select Manage Apps and click Connected Apps.
- Select MakeLeaps and click Edit.
- Under OAuth Policies, change Permitted Users to Admin approved users are pre-authorized
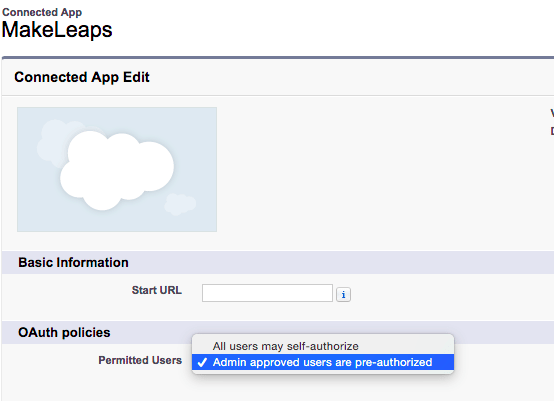
- Click Save.
Edit Permissions
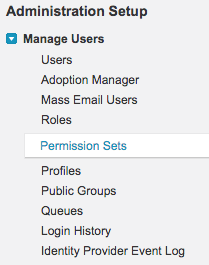
- Navigate to the Setup page.
- Under Administration Setup, click the arrow next to Manage Users, and select Permission Sets.
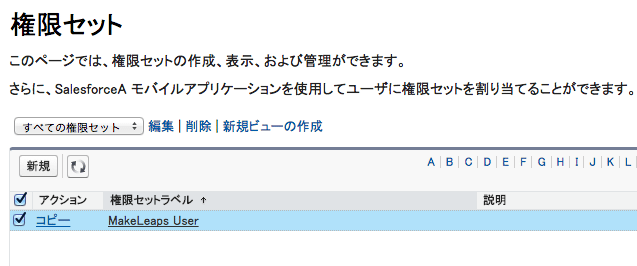
- Find MakeLeaps User in the list and click Clone.(※権限セットを追加できない場合)(写真)
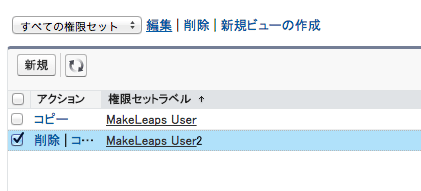
- Modify the name of the new Permission Set Label to MakeLeaps User2 (Optional) and click Save. (写真)
- From the list, click MakeLeaps User2 (created in step 4).
- Click Assigned Apps.
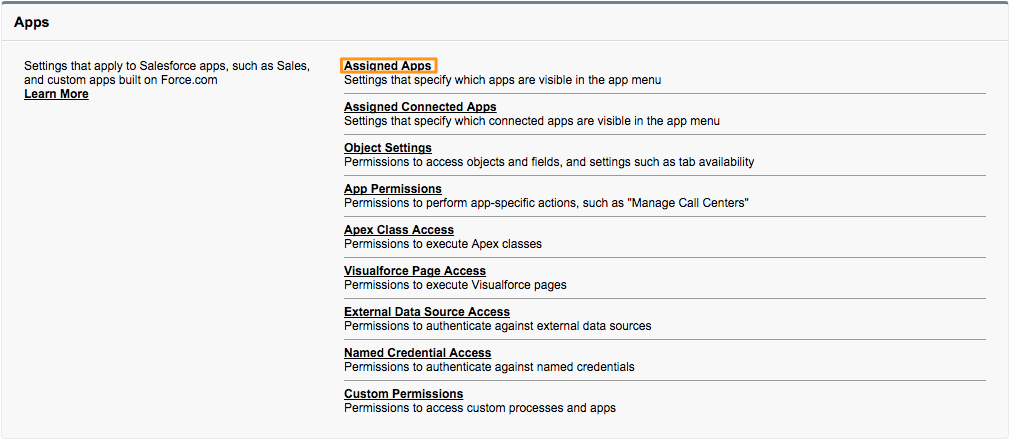
- Click Edit
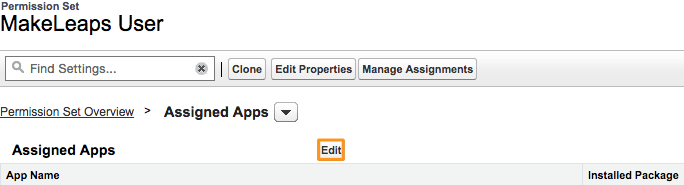
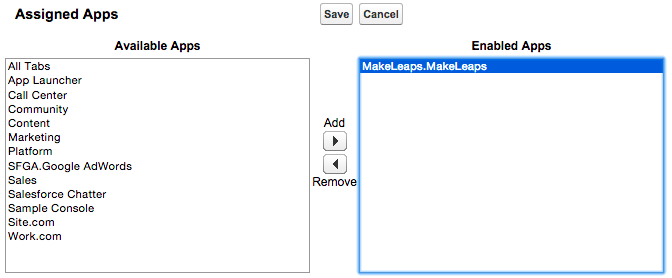
- Move MakeLeaps.MakeLeaps to Enabled Apps and click Save.

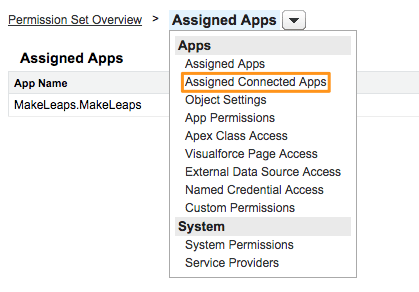
- Under Assigned Apps, click Assigned Connected Apps; click Edit; move MakeLeaps to Enabled Apps; and then click Save.

Manage Assignments
- Navigate to the Setup page.
Under Administration Setup, click the arrow next to Manage Users, and select Permission Sets.
- Click the MakeLeaps User2 (created in Edit Permission).
- Click Manage Assignments(写真)
- Select MakeLeaps Users (写真)

- Click Add Assignments
Modify Accounts
Add MakeLeaps to your account pages.
- Navigate to the Setup page.
- Under App Setup, click the arrow next to Customize, click the arrow next to Accounts, and select Page Layouts.
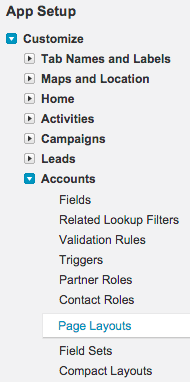
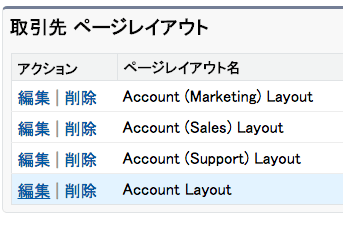
- Click Edit for Account Layout. (写真)
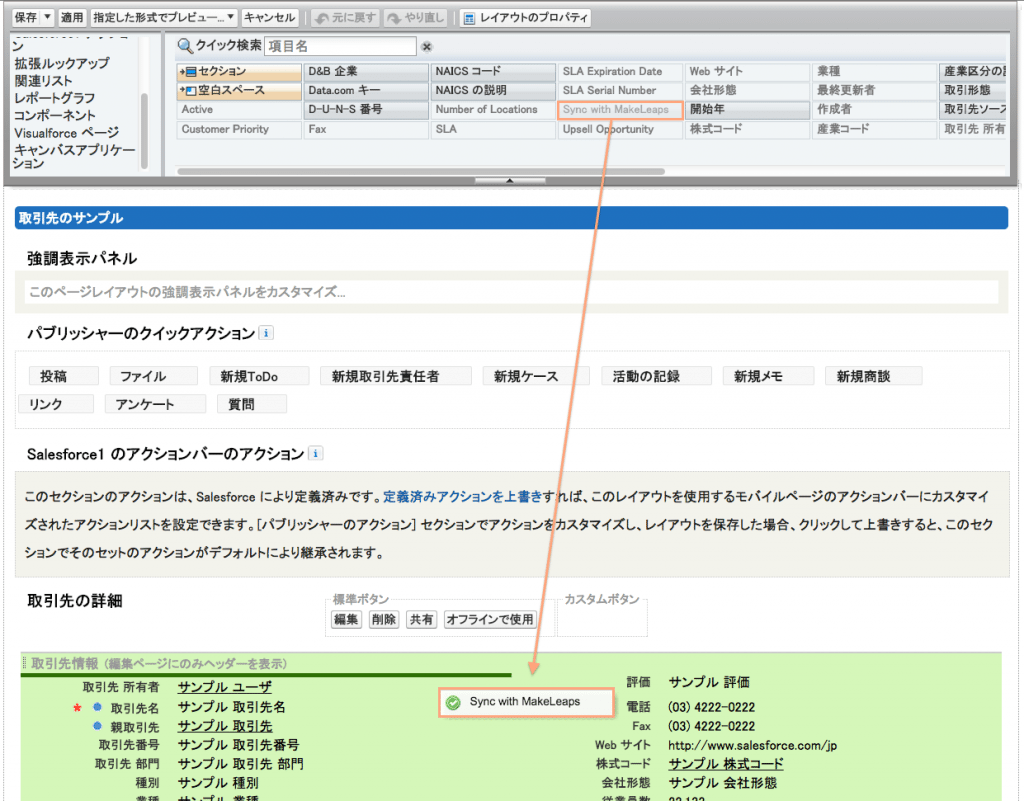
- In the Account Layout panel, click and drag the Sync with MakeLeaps option in the Account Details section. (写真)
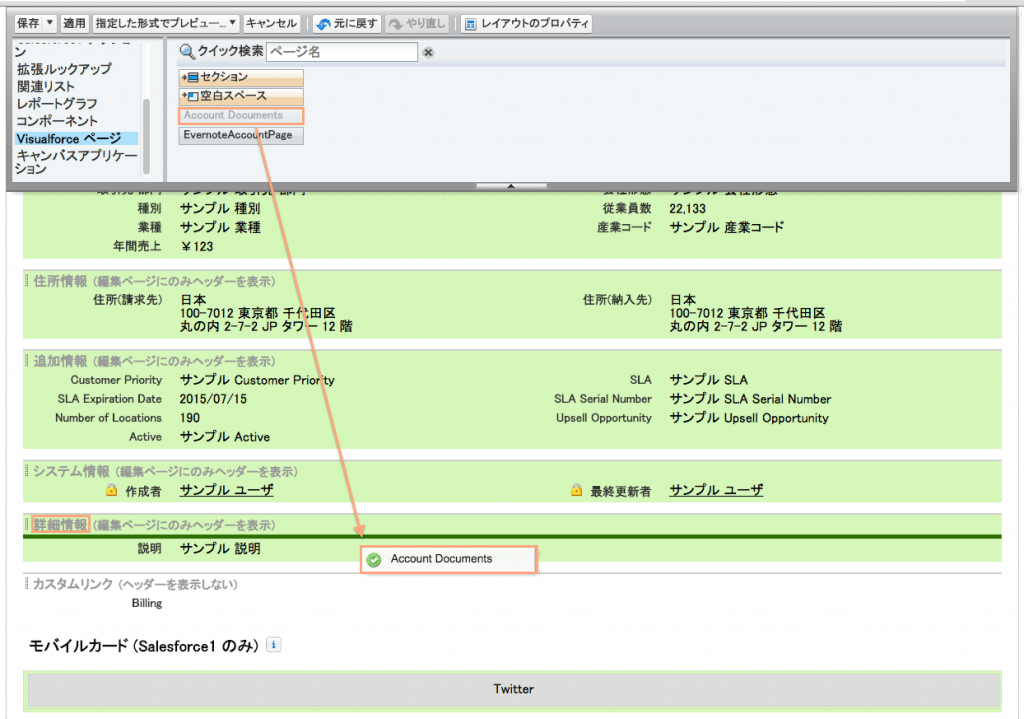
- In the Account Layout panel, click VisualForce Pages and drag the Account Documents option into the Account Details section. (写真)
- Click Save in the Account Layout panel.

Add Send to MakeLeaps button to accounts list page.
- Navigate to the Setup page.
- Under App Setup, click the arrow next to Customize, click the arrow next to Accounts, and select Search Layouts.
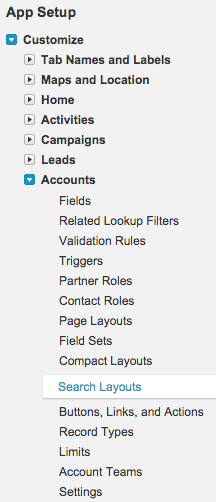
- Click Edit for Account List View.
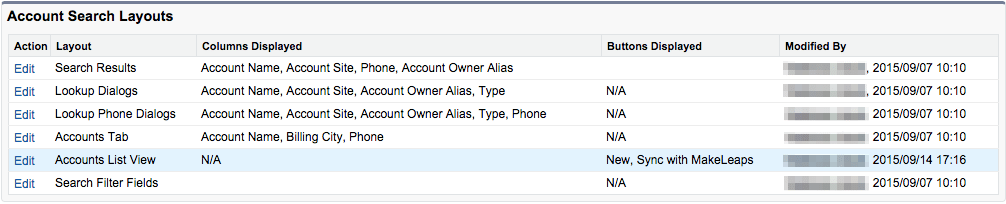
- In the Custom Buttons section, move Sync with MakeLeaps from Available Buttons to Selected Buttons
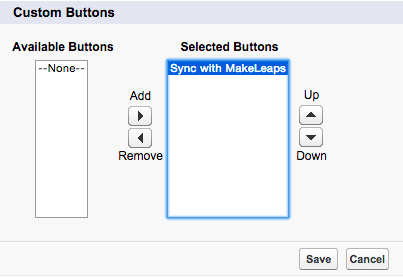
- Click Save
Modify Contacts
Add MakeLeaps to your contact pages
- Navigate to the Setup page.
- Under App Setup, click the arrow next to Customize, click the arrow next to Contacts, and select Page Layouts.

- Click Edit for Contact Layout.
- In the Contact Layout panel, click VisualForce Pages and drag the Contact Documents option into the Contact Details section.
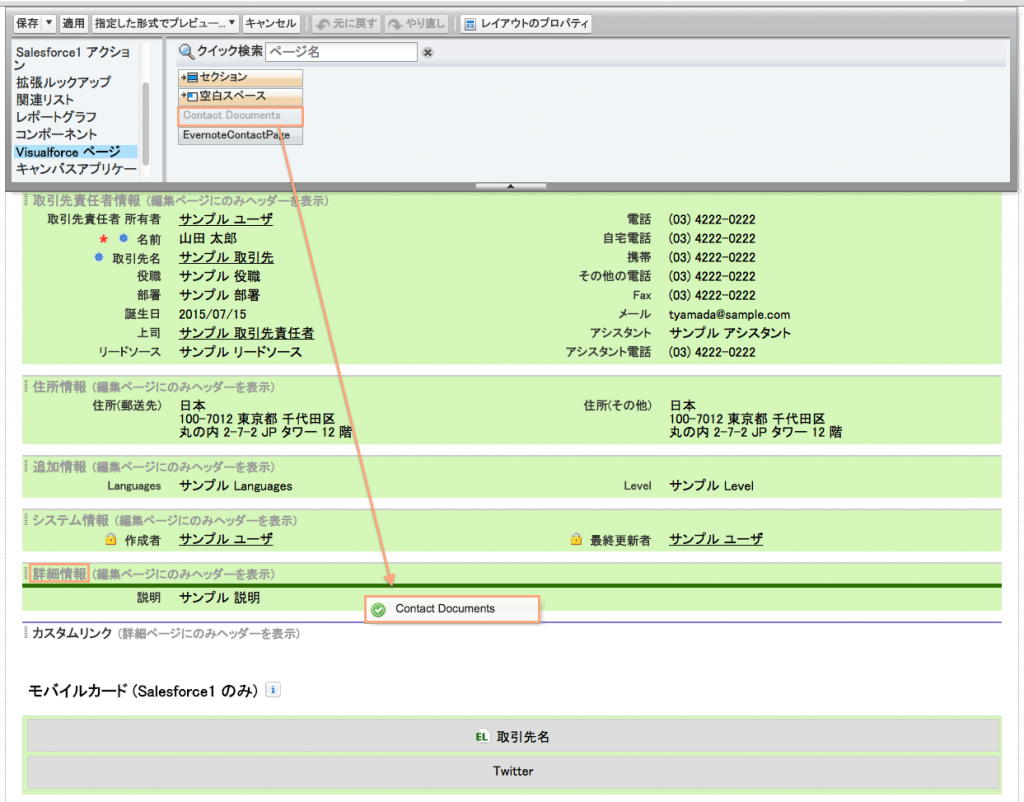
- Click Save in the Contact Layout panel.
「商談」の変更
MakeLeapsを「商談」画面に追加する
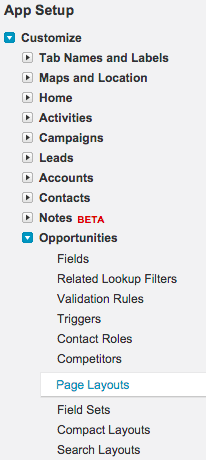
- Navigate to the Setup page.
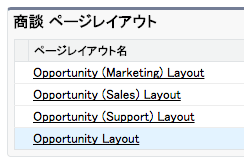
- Under App Setup, click the arrow next to Customize, click the arrow next to Opportunities, and select Page Layouts.
- Click Edit for Opportunity Layout.(写真)
- In the Opportunity Layout panel, click VisualForce Pages and drag Section into the Opportunity Details section. Then change the section name to MakeLeaps and click OK. (写真)
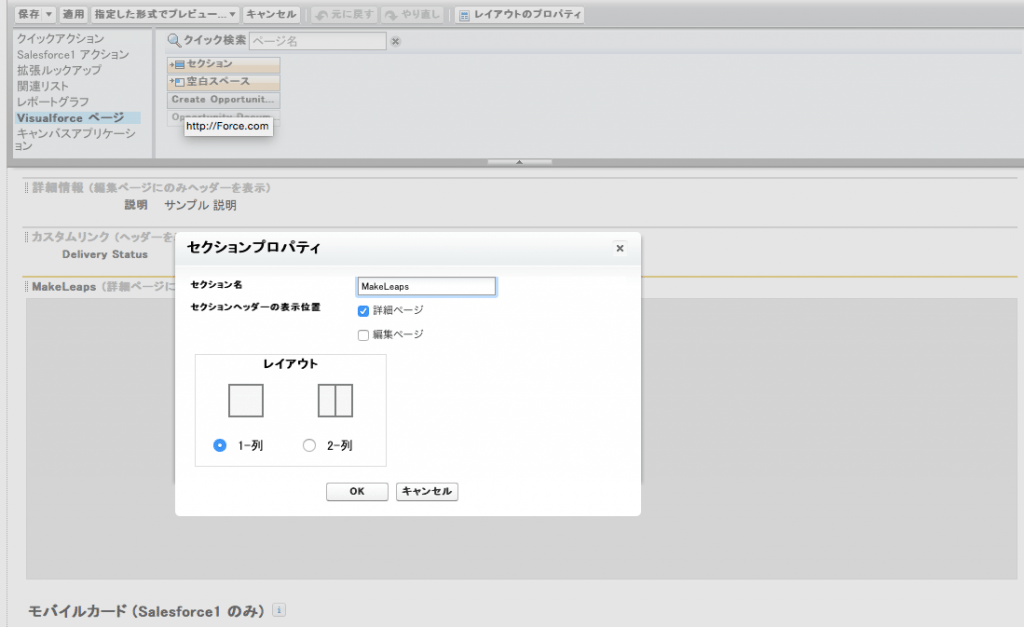
- In the Opportunity Layout panel, click VisualForce Pages and drag the Opportunity Documents into the MakeLeaps section (created in Step 4).
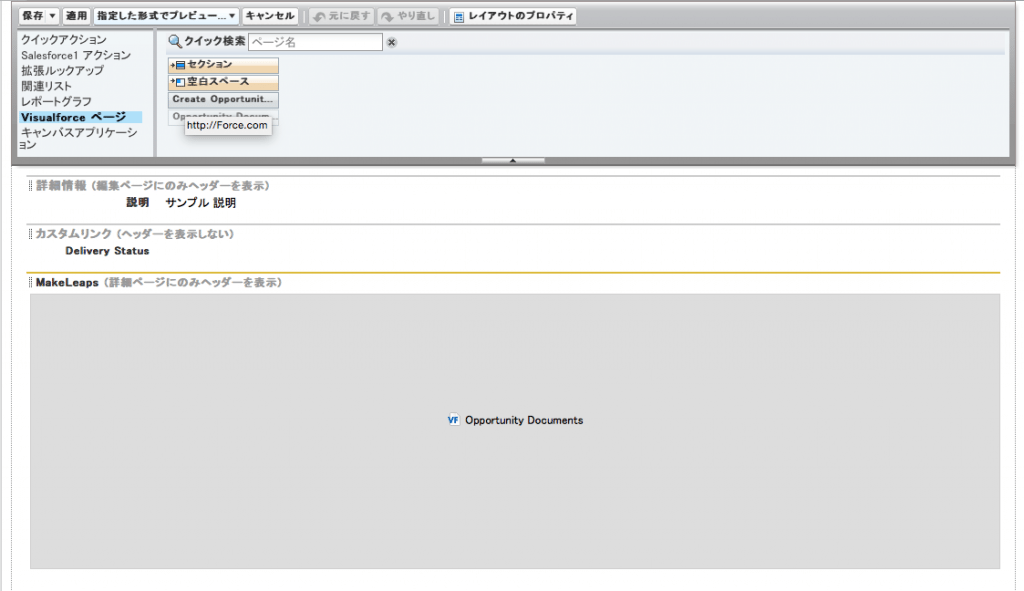
- Click Save in the Opportunity Layout panel.
4. ML4SFを開始する
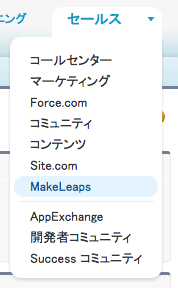
Salesforce内でMakeLeapsと接続する
MakeLeapsのアプリケーションを認証する
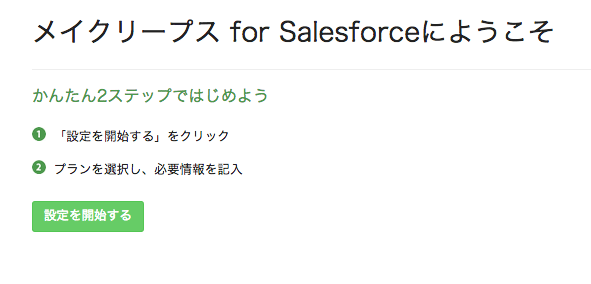
- アプリケーションで「MakeLeaps」を選択する
- 「設定を開始する」をクリック
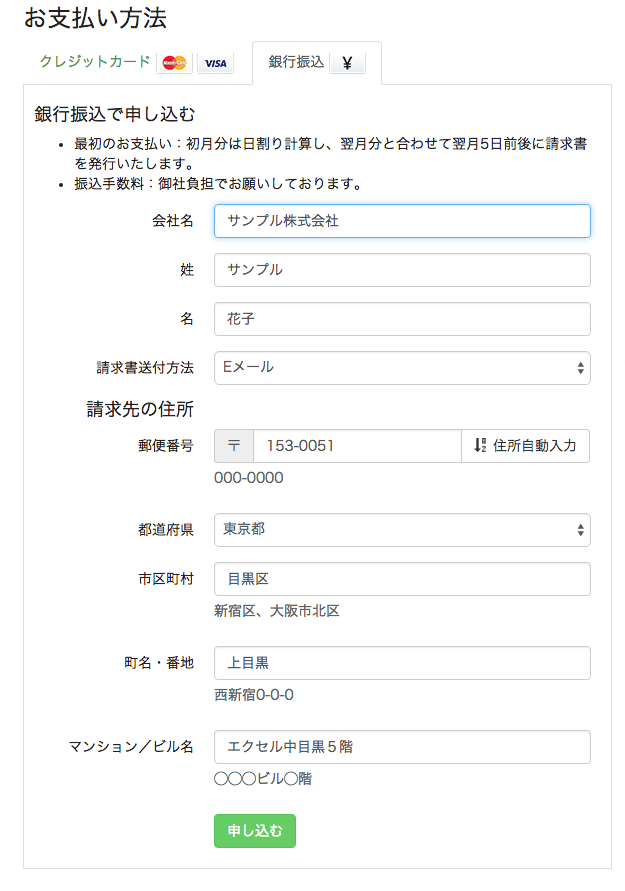
- プランを選択し、社名を記入し、セールスフォース支払い月を選択し、「セールスフォース・ドットコムと連携」をクリック
-1024x814.png)
- 請求書の送付先を記入し、「申込む」をクリック
- 完了
(ご利用の前に)自社情報に印鑑やロゴをアップロードする(MakeLeapsマニュアル)
「取引先」情報をMakeLeapsに同期する
どのSalesforce「取引先」情報を、MakeLeapsと同期するか選択します。
「取引先」の中で「Allow MakeLeaps Export」にチェックが入ったものだけがMakeLeapsに同期されます(取引先責任者も同様)。
- 「取引先」タブから「すべての取引先」ビューを選択
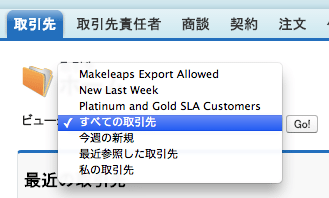
- 同期する取引先を選択し「MakeLeapsと同期」をクリック
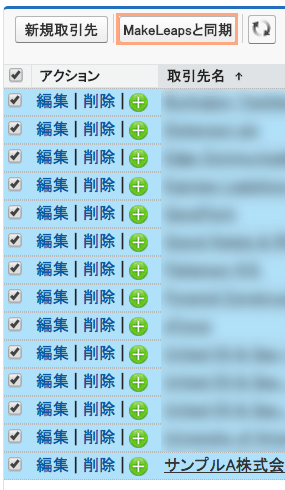
- 確認画面で「確定」をクリック
- 完了(選択した取引先の数により、MakeLeapsに反映されるまでに多少時間を要する可能性があります。)
お疲れ様でした!以上で初期設定は完了です。
【メイクリープスの使い方 [初級編] 】はこちら
5. その他
[GroupまたはProfessionalプランの方] 権限セットを追加できない場合
SalesforceのGroupまたはProfessionalエディションに加入中の方は、権限セットを追加できる数に制限があります。
ユーザリミット超過のため権限コピーができない場合は、既存の権限セットで利用可能なものを使用してください。
新しいユーザを追加する
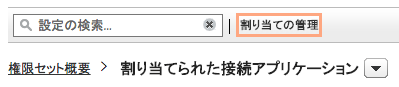
新しいユーザを組織に登録後、「割り当ての管理」でMakeLeapsを割り当ててください。
その他の設定作業は特に必要ありません。
メールポイントを追加する
書類を郵送するには、1通あたり「1メールポイント」が必要です。
- 「MakeLeaps」から「自社設定」のタブをクリック

- 「メールポイントを購入する」タブをクリックし、必要なメールポイント数の「購入」をクリック
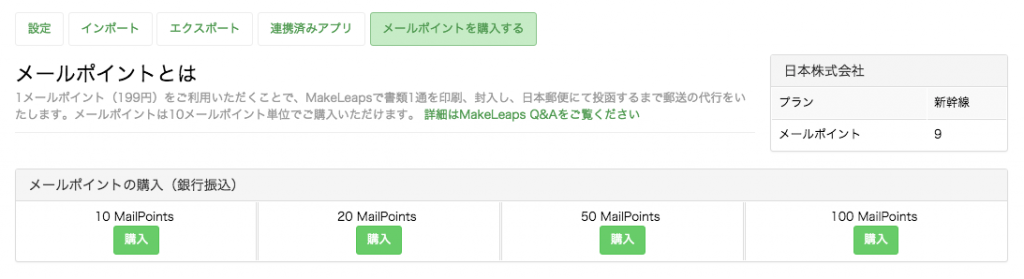
- 「購入」をクリック
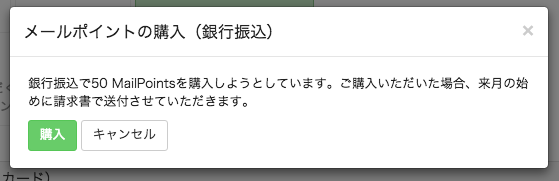
※ポイントは追加されますので、すぐにご利用いただけます。
お問い合わせ
操作方法についてご質問やご不明点があれば、画面右下に表示される「?」よりお気軽にお問い合わせください。

TEL: -
Email:support@makeleaps.com
サポート時間:
平日 10:00 〜 18:00
(土日祝を除く)